SafetyPaperwork
Landscaping · United States

JHA for tree removal

OSHA expects employers to find and control hazards on every job, and many general contractors require a written JHA for tree removal before you start.

A JHA breaks the job into steps, lists the hazards in each step and the controls that protect the crew, and the crew signs it. The main hazards are falling from height, road traffic, aerial lift tip-over or crush and falling tools and materials.

JHA example: tree removal

This is a complete JHA for tree removal, with 10 job steps. Open it in the builder to add your site, crew and signatures, change anything, and download a PDF. Or download the free Word template below and fill it in by hand.

Job Hazard Analysis (JHA)
Tree removal and pruning with a chainsaw · Landscaping · Example
Document JHA-001 · Rev 1

Job steps, hazards and controls

#Job stepHazardsRisk beforeControlsRisk after
1Assess the tree for lean, decay and dead wood, check for power lines and buildings, and plan escape routes; keep 2 tree lengths clear when felling. If any part of the tree or your tools could come within 10 feet of an energized line, only a qualified line-clearance arborist does that work (ANSI Z133, 29 CFR 1910.269 and 1910.333)
  • Contact with overhead power lines
  • Falling tools and materials
High
  • Ask the utility to de-energize, move or insulate the lines before work starts. Elimination
  • Use non-conductive (fiberglass) ladders near any power lines. Substitution
  • Mark the safe distance with flags, tape or warning lines and keep all equipment and people outside it. Engineering (guarding)
  • Keep equipment at least 10 feet from lines up to 50 kV once the utility confirms the voltage, more for higher voltages, and 20 feet when the voltage is unknown (29 CFR 1926.1408). Administrative
  • Use a dedicated spotter whenever equipment moves or raises anything near lines. Administrative
  • Treat all lines as energized. If equipment touches a line, the operator stays in the cab and everyone else keeps well away. Administrative
  • Barricade and sign the drop zone under overhead work so nobody walks beneath. Engineering (guarding)
  • Fit toe boards, kick plates and mesh screens on scaffolds and edges. Engineering
  • Use catch fans, debris netting or covered walkways where people pass below. Engineering
  • Tether hand tools when working at height. Engineering
  • Keep platforms tidy. Do not stack materials near edges or above toe board height. Administrative
  • Lower materials with a hoist, chute or rope. Never throw or drop anything down. Administrative
  • Wear a hard hat anywhere objects could fall. PPE
Medium
2Set up the drop zone with barriers and traffic or pedestrian control
  • Public entering the work area
  • Road traffic
Critical
  • Fence off the site with secure temporary fencing and lock the gates when you leave. Engineering (guarding)
  • Give pedestrians a safe, marked path around the work, with ramps for strollers and wheelchairs. Engineering (guarding)
  • Use hoarding, covered walkways or catch fans where work is above public areas. Engineering
  • Put signs at each entry: site name, contact number and "No unauthorized entry". Administrative
  • Make the site safe at the end of each day: cover holes, lower plant, remove ladders and lock tools away. Administrative
  • Use a spotter when moving plant or materials across public paths. Administrative
  • Do the work at low-traffic times, or close the road or lane with approval. Elimination
  • Put solid barriers between the work and traffic where speeds are high, not just cones. Engineering (guarding)
  • Use a truck-mounted attenuator or buffer vehicle on high speed roads. Engineering
  • Set up work zone signs and cones to MUTCD Part 6, with trained flaggers. Administrative
  • Get any permit needed from the city, county or state DOT before you start. Administrative
  • Park work vehicles to shield the work zone, with beacons on. Administrative
  • Wear ANSI/ISEA 107 Class 2 or 3 high-visibility clothing. PPE
Medium
3Check the chainsaw, chain brake and PPE before starting
  • Chainsaw injuries
  • Loud noise
High
  • Use a different tool where you can, such as a pole saw or hand saw for small branches. Substitution
  • Use a saw with a working chain brake, chain catcher and low-kickback chain, kept sharp and tensioned. Engineering
  • Chainsaw injuries: see step 6 for the full controls Administrative
  • Use quieter tools and methods, such as cut-to-size materials, low-noise machines and battery tools. Substitution
  • Keep noisy plant away from work areas, and use screens or distance between the noise and people. Engineering (guarding)
  • Loud noise: see step 10 for the full controls Administrative
Medium
4Look for nests, wasps and snakes before climbing or cutting
  • Bites and stings
Medium
  • Check work areas before starting, and get pest control to remove nests. Elimination
  • Look before you reach into dark spaces. Administrative
  • Ask owners to keep pets away from the work area. Administrative
  • Know who has allergies and keep their medication, such as an epinephrine auto-injector, close by. Administrative
  • Wear gloves, long sleeves and boots. Use insect repellent outdoors. PPE
Medium
5Set up the aerial lift on firm ground outside the drop zone. Near power lines, use an insulated aerial device that has passed its dielectric test, operated by a qualified line-clearance arborist
  • Aerial lift tip-over or crush
  • Contact with overhead power lines
Critical
  • Check the ground before setting up. Use outriggers and spreader pads, and keep clear of trenches, pits and slopes. Engineering
  • Use a platform with tilt alarm and secondary guarding (anti-entrapment) where there is an overhead crush risk. Engineering
  • Only trained and authorized operators use aerial lifts and scissor lifts (29 CFR 1926.453 for boom lifts, 1926.452(w) and 1926.454 for scissor lifts). Administrative
  • Do a pre-start check each day. Keep a trained person on the ground who can lower the platform in an emergency. Administrative
  • Never exceed the safe working load, climb on the rails or use a ladder in the basket. Administrative
  • In boom-type platforms, wear a harness clipped to the basket anchor point. PPE
  • Contact with overhead power lines: see step 1 for the full controls Administrative
Medium
6Cut from the ground or the aerial lift, never from a ladder
  • Falling from height
  • Chainsaw injuries
Critical
  • Do the work from the ground where you can, for example pre-assemble on the ground or use extension poles. Elimination
  • Install guardrails or edge protection on all open edges before work starts. Engineering (guarding)
  • Use a scaffold, mobile work platform or aerial lift instead of working off a ladder. Engineering
  • Where edge protection is not practical, use a fall restraint or fall arrest system on a rated anchor point. Engineering
  • Provide fall protection at 6 feet or more and train workers to recognize fall hazards (29 CFR 1926.503). Administrative
  • Have a rescue plan so a worker hanging in a harness can be brought down within minutes. Administrative
  • Wear a full body harness with a shock-absorbing lanyard, clipped on at all times when using fall arrest. PPE
  • Use a different tool where you can, such as a pole saw or hand saw for small branches. Substitution
  • Use a saw with a working chain brake, chain catcher and low-kickback chain, kept sharp and tensioned. Engineering
  • Only trained operators use chainsaws. Administrative
  • Never cut above shoulder height or from a ladder. Administrative
  • Follow ANSI Z133 for tree work: start the saw on the ground or firmly supported with the chain brake on, never drop start it, and keep both hands on the saw. Administrative
  • When felling, keep everyone at least two tree lengths away. Administrative
  • Wear chainsaw chaps or pants (ASTM F1897), safety boots, gloves, a hard hat (Class E near power lines), eye protection with a face screen, and hearing protection (ANSI Z133). PPE
Medium
7Drop limbs in sections into the clear drop zone. Before cutting bent or loaded wood, work out which side is under tension and stand clear of where it will spring
  • Falling tools and materials
High
  • Falling tools and materials: see step 1 for the full controls Administrative
Medium
8Fell the stem with a scarf cut on the felling side and a back cut that leaves a hinge, call a warning, then step back along the planned escape route
  • Falling tools and materials
  • Chainsaw injuries
High
  • Falling tools and materials: see step 1 for the full controls Administrative
  • Chainsaw injuries: see step 6 for the full controls Administrative
Medium
9Refuel with the engine off and the saw cool, on bare ground away from ignition, using an approved fuel can, with an extinguisher at the vehicle
  • Fire and emergencies
High
  • Provide fire extinguishers suited to the site, checked and easy to reach. Engineering
  • Keep exits and escape routes clear and signed. Engineering
  • Have a site emergency plan: alarm, exits, assembly point and emergency contacts. Administrative
  • Keep a stocked first aid kit and at least one trained first aider on site. Administrative
  • Know the site address and how emergency services get in. Call 911. Administrative
  • Go through the emergency plan with every worker and visitor at induction. Administrative
  • Keep flammable materials and rubbish away from exits and escape routes. Administrative
Medium
10Chip or stack wood: feed the chipper butt first from the side, never reach past the feed control bar or kick material in, and stop and isolate it before clearing a jam; then clean up
  • Lifting and carrying heavy loads
  • Hand-arm and whole-body vibration
  • Loud noise
  • Poor housekeeping and waste
High
  • Plan to avoid carrying: have materials delivered, and old items picked up, as close as possible to where they are used. Elimination
  • Use lighter or smaller loads: order smaller bags and shorter lengths, and drain or break down old items before moving them. Substitution
  • Use trolleys, pallet jacks, hoists, vacuum lifters or plant instead of carrying by hand. Engineering
  • Use a two-person lift for anything heavy, long or awkward. Plan the route first and clear it. Administrative
  • Use low-vibration tools and methods, such as a breaker on an excavator instead of a hand jackhammer. Substitution
  • Keep tools sharp and well maintained, and use anti-vibration handles and seats. Engineering
  • Limit trigger time on high-vibration tools and rotate workers. Administrative
  • Keep hands warm and dry, and take regular breaks. Administrative
  • Use quieter tools and methods, such as cut-to-size materials, low-noise machines and battery tools. Substitution
  • Keep noisy plant away from work areas, and use screens or distance between the noise and people. Engineering (guarding)
  • Keep tools maintained and use mufflers on compressors and generators. Engineering
  • Limit time on noisy tools and rotate workers. Administrative
  • Order materials to size and send packaging back where you can. Elimination
  • Put dumpsters and waste chutes close to the work. Engineering
  • Clean as you go, and do a full clean up at the end of each day. Administrative
  • Keep exits, stairs and walkways clear at all times. Administrative
Medium

PPE

Chainsaw chaps (ASTM F1897)Hard hat (ANSI Z89.1)Face shield (ANSI Z87.1)Hearing protection (earmuffs or plugs)Work glovesSafety-toe boots (ASTM F2413)High-visibility safety apparel, ANSI/ISEA 107 Class 2 or 3 (Type R near roadways)Safety glasses (ANSI Z87.1)Cut-resistant glovesCoverallsPersonal fall arrest system (harness)

Plant and equipment

Chainsaw: Trained operator; tree work to ANSI Z133Boom lift (aerial lift): Trained and authorized operator (29 CFR 1926.453, ANSI A92.24 training and familiarization)TrailerHand tools

Permits and plans

Written fall protection plan (only where guardrails, nets or personal fall arrest are not feasible, 1926.502(k))

Emergency

Call 911. Add the nearest hospital, the assembly point and the first aid / cpr person for your site.

Sign-off

Supervisor and every worker sign to confirm they have read and understood this JHA.
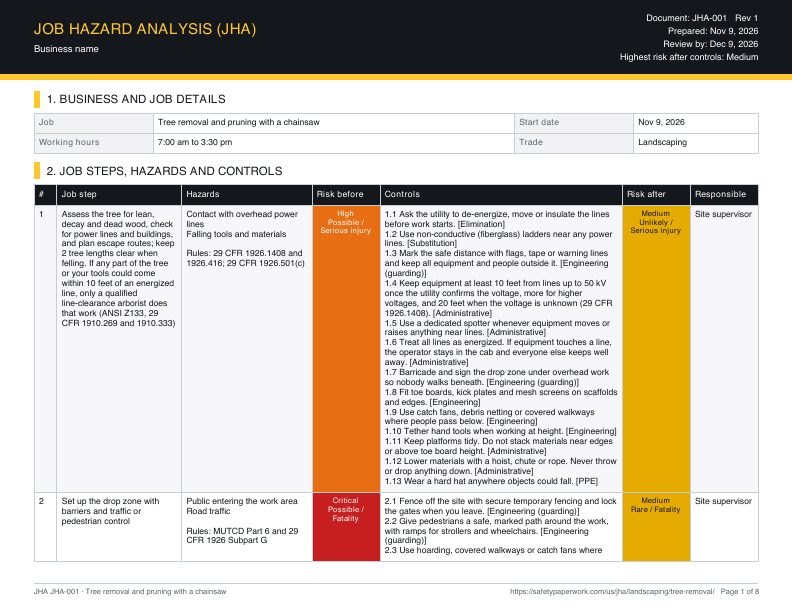
Page 1 of the free tree removal JHA template: business details, job steps with hazards, risk ratings and controls

Free JHA template for tree removal

Word (.docx) and PDF, Letter landscape, no email needed. Fill in your site details, then print or send it.

Make yours in 2 minutes

Same document, filled in for your job. Answer a few yes or no questions, the crew signs on the phone, and you send the PDF.

Start this JHA

Pre-start checklist for tree removal

Tick these off before work starts. They come from the hazards, permits and equipment in this job.

The safe sequence of work

  1. Assess the tree for lean, decay and dead wood, check for power lines and buildings, and plan escape routes; keep 2 tree lengths clear when felling. If any part of the tree or your tools could come within 10 feet of an energized line, only a qualified line-clearance arborist does that work (ANSI Z133, 29 CFR 1910.269 and 1910.333)
  2. Set up the drop zone with barriers and traffic or pedestrian control
  3. Check the chainsaw, chain brake and PPE before starting
  4. Look for nests, wasps and snakes before climbing or cutting
  5. Set up the aerial lift on firm ground outside the drop zone. Near power lines, use an insulated aerial device that has passed its dielectric test, operated by a qualified line-clearance arborist
  6. Cut from the ground or the aerial lift, never from a ladder
  7. Drop limbs in sections into the clear drop zone. Before cutting bent or loaded wood, work out which side is under tension and stand clear of where it will spring
  8. Fell the stem with a scarf cut on the felling side and a back cut that leaves a hinge, call a warning, then step back along the planned escape route
  9. Refuel with the engine off and the saw cool, on bare ground away from ignition, using an approved fuel can, with an extinguisher at the vehicle
  10. Chip or stack wood: feed the chipper butt first from the side, never reach past the feed control bar or kick material in, and stop and isolate it before clearing a jam; then clean up

Hazards to watch on tree removal

The hazards most specific to this job, and the step where each one comes up.

Step 3, 6, 8Chainsaw injuriesChainsaw kickback or contact with the chain causes deep cuts to the legs, arms and face.
Step 4Bites and stingsSnakes, spiders, wasps, ticks and dogs bite or sting workers in attics, crawl spaces and yards.
Step 5Aerial lift tip-over or crushThe platform tips on soft or sloping ground, the worker is crushed against a beam or ceiling, or is thrown out of the basket.
Step 2Road trafficPassing cars and trucks hit workers or plant working on or next to a road.
Step 9Fire and emergenciesA fire, injury or other emergency happens and workers cannot get out, raise the alarm or get first aid in time.
Step 1, 5Contact with overhead power linesA ladder, aerial lift, crane, dump truck or long length of material touches or gets close to an overhead line and electrocutes people.
Almost certainLikelyPossibleUnlikelyRareHow bad it could be: First aid only to FatalityBA
Highest risk on tree removal: Critical before controls (B), down to Medium after controls (A), on the United States 5 by 5 risk matrix (likely and fatality becomes unlikely and serious injury).

What changes on your site

This example covers the job itself. Your site may add more. Add controls for any of these that apply (the builder asks you these as yes or no questions):

  • Will anyone use a ladder or stepladder?
  • Will anyone work on a roof?
  • Is there a skylight, fiberglass panel or other fragile roofing?
  • Will you use a scaffold or rolling tower?
  • Was the building built before 1981?

Licences and legal requirements in United States

Equipment on this job that needs a licence, ticket or training:

  • Chainsaw: Trained operator; tree work to ANSI Z133
  • Boom lift (aerial lift): Trained and authorized operator (29 CFR 1926.453, ANSI A92.24 training and familiarization)

OSHA requires employers to find and fix hazards and to train workers on them. A JHA breaks the job into steps, lists the hazards in each step and the controls that protect the crew. General contractors often require one before you start.

Rules that apply: 29 CFR 1926.1408 and 1926.416; 29 CFR 1926.501(c); MUTCD Part 6 and 29 CFR 1926 Subpart G; ANSI Z133 (tree care) and OSH Act Section 5(a)(1); 29 CFR 1910.266(e)(2) where logging rules apply; 29 CFR 1926.52; 29 CFR 1926.453 (boom lifts); 1926.452(w) and 1926.454 (scissor lifts); 29 CFR 1926 Subpart M; 29 CFR 1926 Subpart F.

Why JHAs get rejected

General contractors send documents back for these reasons. This example avoids them, but check yours too.

  • Generic steps such as "work safely" or "use PPE" with no task-specific hazards or controls.
  • No OSHA standards referenced for the hazards that have them, such as fall protection, ladders, scaffolds or silica.
  • No competent person named for fall protection, excavation, scaffolds or silica where those hazards exist.
  • Equipment listed without inspection requirements, and no training listed for the people using it.
  • Respirators listed with no respiratory protection program, medical clearance or fit test.
  • Controls rely only on PPE when engineering controls such as guardrails, wet cutting or extraction are feasible.
  • No crew sign-off, or no date and revision when the job has changed.

Questions

Do I need a JHA for tree removal?

OSHA expects employers to find and control hazards on every job, and many general contractors require a written JHA for tree removal before you start.

Who signs the JHA?

The supervisor or competent person who prepared it signs, and every crew member signs to show they were trained on the hazards and controls before the job starts. Many general contractors also sign to accept it.

How long do I keep it?

Keep this JHA on site during the job, and keep it with the training and inspection records for at least 1 year after the job (longer if your state plan or general contractor requires it). OSHA does not set a retention period for JHAs themselves.

What PPE is needed for tree removal?

Usually Chainsaw chaps (ASTM F1897), Hard hat (ANSI Z89.1), Face shield (ANSI Z87.1), Hearing protection (earmuffs or plugs), Work gloves, Safety-toe boots (ASTM F2413), High-visibility safety apparel, ANSI/ISEA 107 Class 2 or 3 (Type R near roadways), Safety glasses (ANSI Z87.1), Cut-resistant gloves, Coveralls, Personal fall arrest system (harness). The site rules may add more, so check with the general contractor.

More landscaping JHAs

Related jobs in other trades

Toolbox talks for this job

Blank JHA template: free JHA templates. Also for other countries: Australia (SWMS) · United Kingdom (RAMS) · Canada (FLHA)

Sources